Kabod Artistry

Splendor. Excellence. Beauty. YOU!

Filtering by Category: Beauty Tools

The Germs Live WHERE?

And you thought you were safe…


Did you know that many people are completely unaware of the presence of germs in makeup? Many individuals are oblivious to the fact that bacteria, fungi, and other pathogens can thrive in their beauty products. From mascaras and lipsticks to foundation and eyeliners, makeup provides an ideal environment for these microbes to flourish. Without proper care and hygiene, these products can become a breeding ground for harmful germs that can lead to skin irritations, infections, and other health issues. It's essential for everyone to understand the importance of regularly cleaning their makeup tools and to be mindful of the expiration dates of their products to avoid potential health risks. Unbeknownst to us, we continue to use these products month after month, year after year. There is a day were your body realizes that there is “something up” and you find you have a “special visitor” on your chin or forhead. Well, you know what time it is. Let’s go right to the makeup drawer and see what’s a-lurkin’.


Image by @beautysoclean/instagram

Dirty tools…


I don’t want to scare you, but you want to start looking for germs in your brush bag. It's important to know that your makeup brushes and beauty sponges can harbor harmful bacteria and fungi from old makeup and skin oils. Using dirty brushes or sponges can transfer germs to your skin, causing acne, infections, and irritation. Regularly cleaning your brushes with gentle soap or a specialized cleaner can help keep your skin safe and your makeup flawless. Don't overlook the hygiene of your brushes to protect your skin and enjoy your makeup safely.

Bust Some Suds…


Cleaning your makeup brushes is an essential part of your beauty routine to ensure that your brushes remain hygienic and your skin stays healthy. Here's a step-by-step guide to effectively clean your makeup brushes:
1. Gather Your Supplies: You will need a gentle clarifying shampoo, antibacterial soap or brush cleanser, a bowl, lukewarm water, a clean towel, and a brush cleaning pad or silicone glove. Dawn dish soap, 91% alcohol and 3 drops of olive or coconut oil is another excellent substitution if you do not have clarifying shampoo.
2. Wet the Bristles: Begin by running the bristles of the brush under lukewarm water. Be cautious not to get the handle of the brush wet as this can weaken the glue over time.
3. Shampoo Time: Put a small amount of the gentle clarifying shampoo or antibacterial soap into the palm of your hand or on the brush cleaning pad. Gently swirl the bristles in the shampoo, working into a lather. If using a brush cleaning pad, move the brush in circular motions to ensure all bristles are covered.
4. Rinse Thoroughly: Rinse the bristles under lukewarm water until the water runs clear. Avoid getting water above the handle of the brush as it can loosen the glue and cause bristle loss. Pro-Tip: If you still have soap in your brushes, your brushes are NOT CLEAN! Repeat the rinse process without soap.
5. Gentle Squeeze and Reshape:
Gently squeeze out the excess water from the brush, being careful not to pull on the bristles. Then, reshape the brush to its original form.
6. Dry the Brushes:
Lay your brushes flat on a clean towel to air dry. Alternatively, you can hang them over the ledge of the counter or table with the bristles to allow air circulation. This will prevent the formation of mold.
7. Cleaning Frequency: Aim to clean your brushes at least once a week, particularly for brushes used with cream or liquid products. Brushes used on the eyes should be cleaned more frequently to prevent bacteria buildup.
Regularly cleaning your makeup brushes not only keeps your skin clear and healthy but also prolongs the lifespan of your brushes.

*Beauty Sponges should be thrown out after two uses. These can be cleaned with a mild soap as well, but keep in mind, it is hard to determine if your beauty sponge is clean to the core.

AI Makeup Artist Cleaning Brushes

I Hope I didn’t Scare You…

If I did, GOOD! I will say that was a lot to take in, but it was much needed information I needed to share with you. Could we all agree that proper tool cleaning will keep those nasty germs away? I hope you can squeeze in a few moments at the end of the week and pull out those brushes. Give them a good, good clean so your face can be a happy camper. Happy washing!


The Makeup Drawer- Oh Blush, Chile!

Go look in your makeup drawer now! Is there blush in there??? Take it out and let’s try it!

Oh Blush, Chile!

I absolutely love blush and how it really ties the entire look together. It’s gives the look of life, happiness and youth. If you are an 80’s baby like me, you may remember Cyndi Lauper, Grace Jones, Madonna, and Whitney Houston rock the big hair, colorful eyeshadow that reached far into the heavens, and the pinkiest of the pink blush! Although most of us wouldn’t dare to wear something that bold, you can wear variations pink, orange, or red regardless of your skin color. Today, we have so many choices of blush. Which one do we choose?? Do I go pink or should I stick to complexion colors? Let’s explore! So without further delay, let’s dig through your makeup drawer!


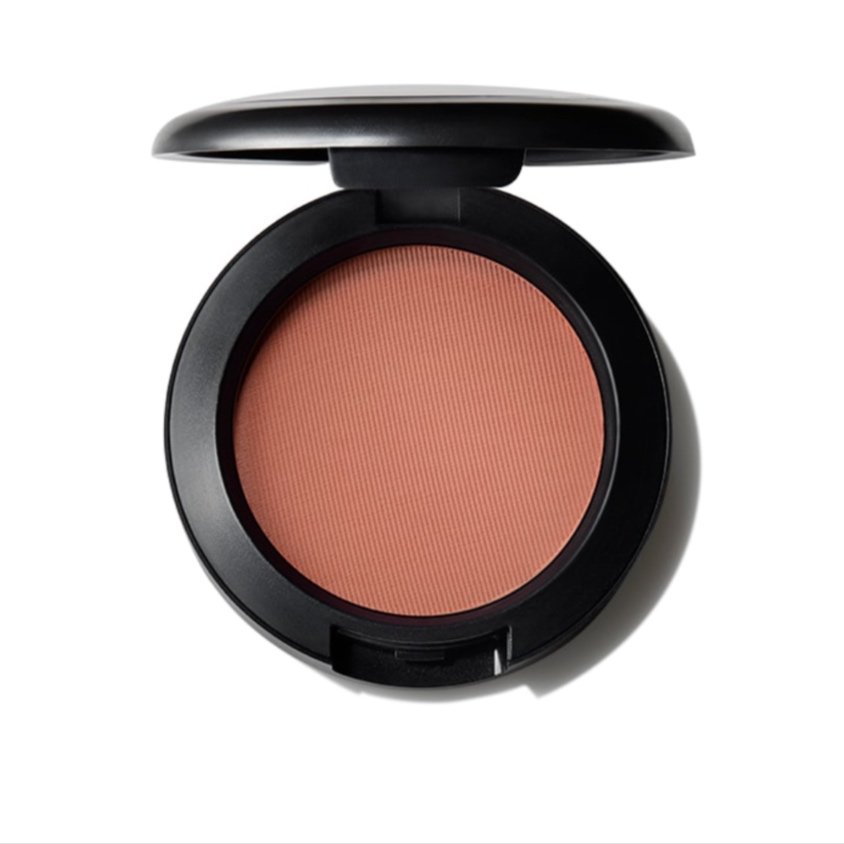
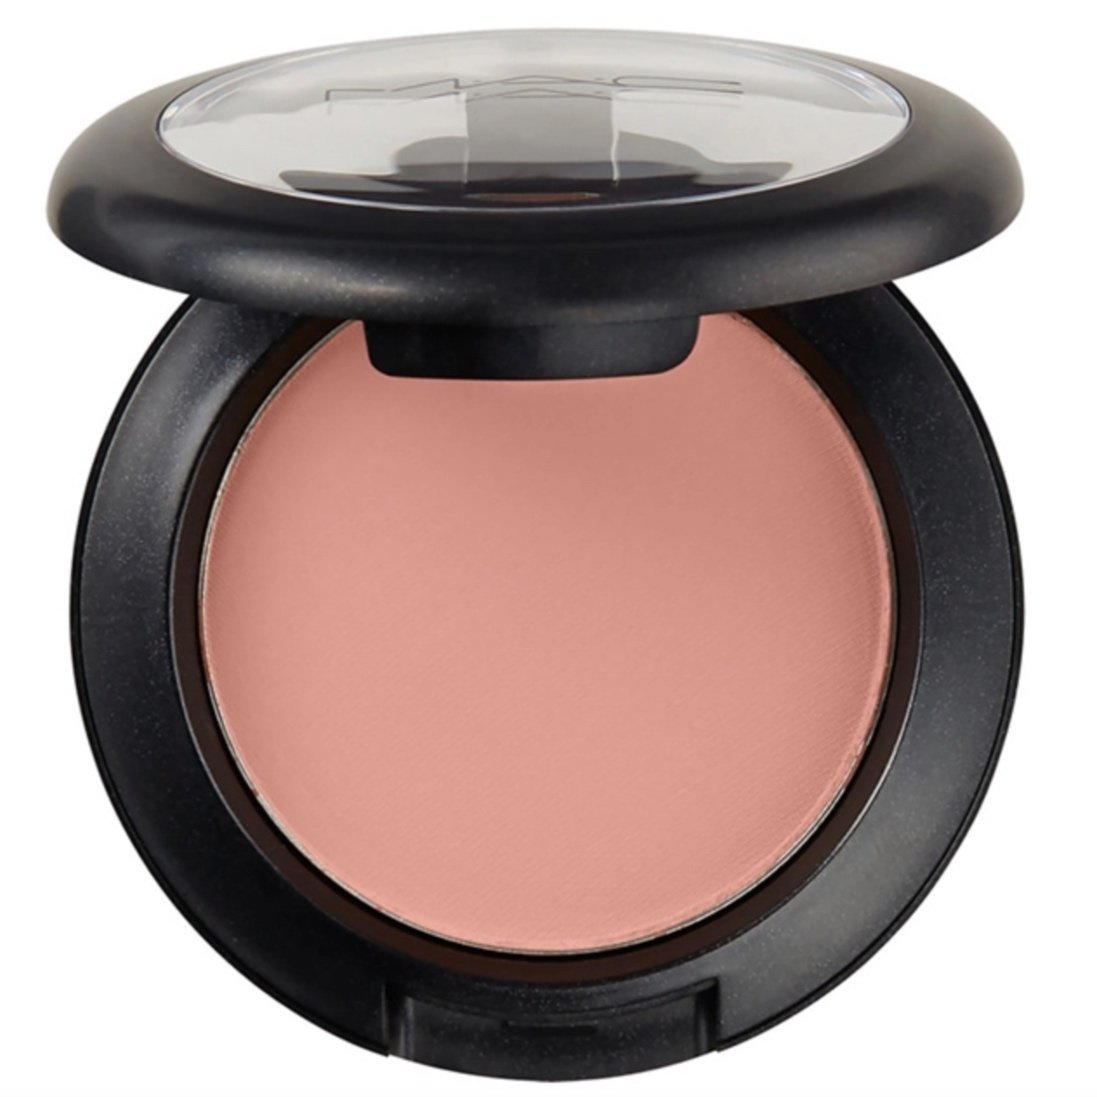
Many women that have had their makeup done at their local MAC counter have walked away with the cult favorite blush “Razin”. It is a beautiful a red-brown with a hint of “golden" undertones. It’s a very safe color to say the least since it leans more on the side of what I call ‘skin-tone blush’. Another gorgeous skin-tone blush I adore by MAC is ""Coppertone" (not shown). Coppertone is a peachy-brown color that is great for medium-skin tones and will gently warm up any look. Brighter colors are a bit scary and I totally understand! These colors will still give you the perfect blushed look you are looking for.

Smile and Say “Peaches”!

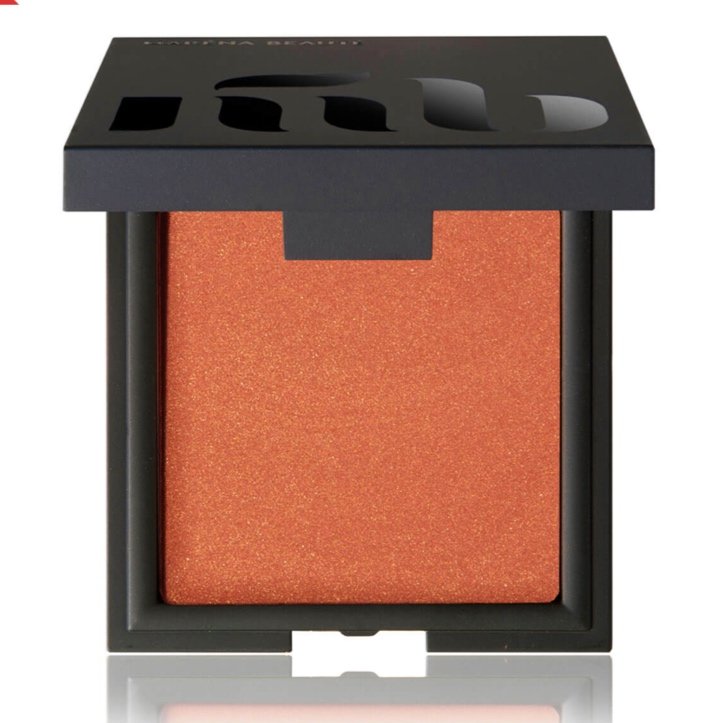
Hear me out, ok?! Peach. Toned. Blush!! If you have this color in your makeup drawer, consider yourselves blessed! This is my absolute favorite color blush to put on ALL types of skin tone, especially darker tones. Speaking of darker skin tones, we don’t “blush” like those with lighter skin. Lighter complexions have “red” or “pink” hues when they blush. On medium-dark to dark complexions, red and brown yields more of an orange-y color on the cheeks. This is why a beautiful peach would bring balance and a more natural look. If you don’t have a peach blush in your arsenal, may I recommend “Marron Peach” by Marena Beauté. Talk about chef’s kiss! For my ladies who have light to medium skin tones, MAC Cosmetic’s “Peaches” will give you the perfect sheer wash of color without giving you an orange-y swoosh. This blush is a sheer to light coverage that is buildable and blendable.

The Neons…

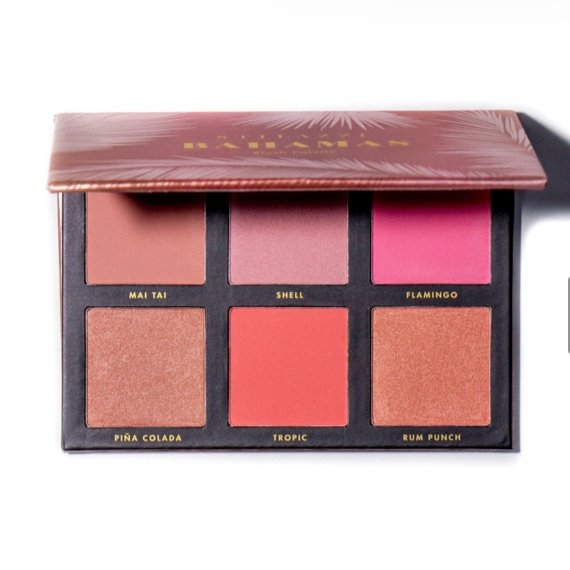
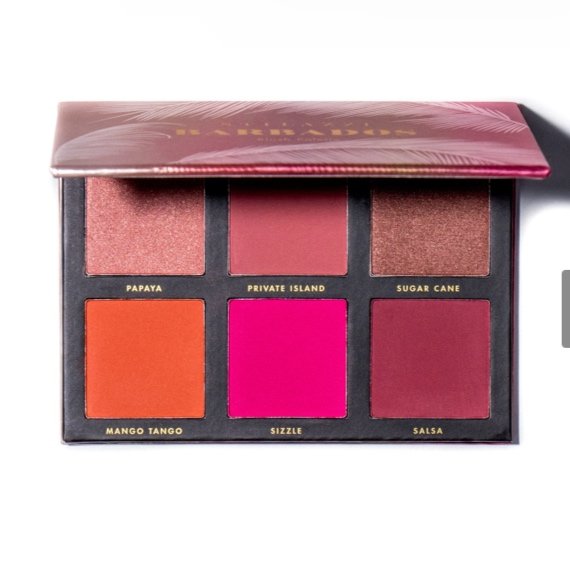
If you picked this up by mistake and wasn't sure that you were ever going to use it again, then you are sadly mistaken. These are the scary colors that I was talking about before. Bright colors are definitely used for the more editorial look you see in the magazines, but I am here to tell you that you have the ability to wear those bright, gorgeous colors. Deep dark skin completions are the perfect canvas for these colors as they bring these colors to life. Neon colors on top of dark skin enhances the tone of the blush. I have in my drawer the “Barbados” Blush palette from Stillazi that is my go-to for my neons and if you need to go lighter than that, try their “Bahamas” palette (Stillazi).

Buy, then try!

Let’s give it a try to see if this blusher works for you

Let’s Give it a Try

I wouldn’t be a good Beauty Tour Guide if I didn’t give you tips on how to apply blush, right?? I am going to give you very simple keys to applying blusher with just a couple of simple techniques. One thing we as women do is we never pay attention to how much we “load” or put product on our brushes. Many women dig and swirl around their brushes in the blush until they see pink and they directly apply. This will cause you to look clownish, or cartoon-like when you have visibly, heavily-pigmented cheeks. Remember less is more when it comes blush. Load the tip your brush with one or two good swipes, no digging. Gently tap the brush to remove excess product and apply by gently tapping the cheeks. I love using the tapping motion as it directly places the blush where I need to go. Be sure follow up with a gentle sweeping motion to blur any lines of demarcation. The shorter side bristles of the brush will diffuse any harsh lines, if any. Do this until you feel comfortable with the amount of blush you’ve added. If you find that you have added too much blush to your cheeks, simply take a small bit of translucent or your personal face powder and go over the area that is the brightest. Be careful as to not use too much of your face powder as it could muddy the look of your blush. Begin to take notice of blush placement as you apply the product. Knowing your face shape will help you in applying blusher and help accentuate your cheekbones. Below I’ve found a face chart guide that shows you were to put blush according to your face shape. Which shape are you?

Getting Cheeky…

You are going to see what a difference blush makes in elevating your look. Something that small adds so much potential to a look. Take time to go through your makeup drawer and test which blushes you like and if you do not have any, add that to your list of things to get from your local beauty store. Remember, if you aren’t satisfied with your choice, you can always take it back.

Happy Blushing! - Mel

Copyright © 2025  Kabod Artistry, LLC.   All Rights Reserved.